
Here in the foothills of the Missouri Ozarks, we’re not exactly known for our stellar soil. Actually, the term “unctuous red clay” came from the soil around these withered old mountains. So, unless you live in a river valley, most veggies don’t like the soil around here.
To fix this, we build raised beds. Some folks just hill up some quality soil mixed with compost without any sort of defined boundaries, and that works. Many, like myself, enjoy the cleaner look of a physical bed as well as the lower maintenance that goes along with it. Raised beds also have excellent drainage, which is very important to happy, healthy plants.
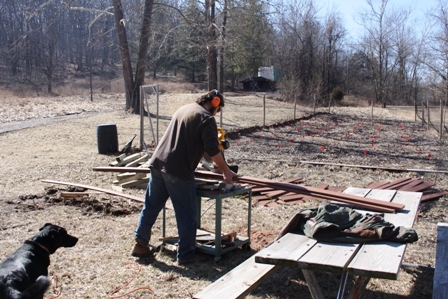
Cutting the decking to the lengths I needed. These beds are all 4′ x 8′.
The inherent problem with raised beds is that they are frequently made of wood. The soil that’s inside the bed and pushed right up against the wood really likes the wood. It likes it so much that in fairly short order, it converts that wood into soil (probably in an effort to be even closer friends)
You can get around this using stone or brick, but that’s heavy and requires concrete of some sort to glue it all together. What I use is composite decking. It is 90% plastic and 10% wood fiber, typically. “Oh but plastic is bad,” you might say. It’s all cool, this is almost entirely recycled plastic. Turns out, the easiest things to do with plastic is melt it down into a lump, which is essentially what this decking is. Once melted, it’s all inert so nothing is going into your garden soil.
The leg posts don’t need to be this long, I went a little crazy on the first one!
Looking at the pictures, you will see that we do use wooden corner posts, but these are built on the outside of the bed in an effort to minimize soil contact, and limit any co-mingling of those two.

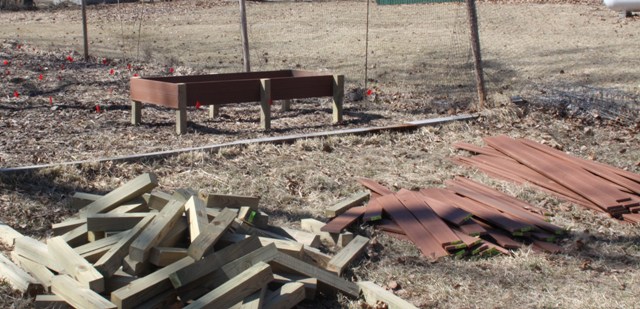
Gnorm the Gnome protecting the freshly created beds.
These are more expensive to create, but they will last much longer than the traditional cedar raised beds you can purchase in the silly kit at your neighborhood lowe’s depot. Check out the pictures and give it a shot. It’s nice to build these in the summer and fall, so they are ready to fill with a soil/compost mixture in the winter or early spring and be all ready for your growing season.

Find some friends to help fill all of them! Pay them in future produce.
If you notice the two taller boxes in the back of the garden, those function of simple cold frames. I can place a piece of plexiglass over the top and turn it into a mini-greenhouse to start growing salad greens as early as January!

Jumpstart the growing season by creating cold frame style raised beds.
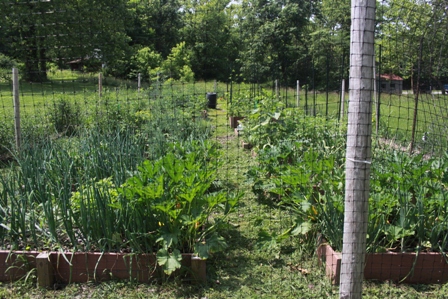
Here it is all full of plants. The fence is to keep deer out and it works…mostly. Many of the beds are ringed with storage onions as a way to maximize edge space, but that’s a topic for another day.
Happy plants in a giant cage!
