
When Travis asked me to do a guest post about quilting I was a little skeptical. Most of his posts are somewhat instructional, and although I’ve been sewing for a long time, I’ve never really focused on learning “actual sewing principles.” I still consider myself an amateur. This is especially true when it comes to quilting, which I’m just beginning to learn. So keep that in mind if you came here expecting to learn fancy techniques. I have no fancy techniques.
My mom taught me how to sew and how to use her sewing machine when I was just a wee lass. I used it to repair clothes and make basic things like tote bags and hippie skirts and such. I was in college when my grandparents decided to downsize, and I inherited my grandmother’s old Penncrest. I used this machine exclusively for probably the next ten years. It was, and still is, a table-shaking, fabric chewing beast that weighs as much as a large dog. Or, in our house, an adequately sized dog.
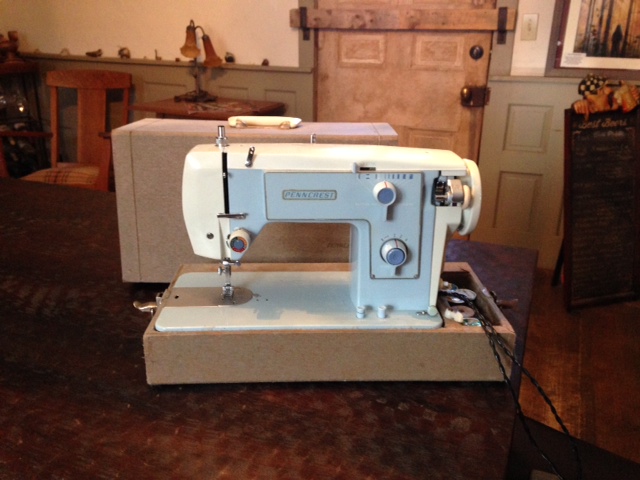
RAWR feed me fabric!
I decided to make a quilt for our bed after we moved and mostly used the woodstove to heat our house. The bedroom is upstairs and gets pretty cold, plus quilts are awesome. I saw a picture of a log cabin design, which consists of strips of fabric sewn in a concentric design around a center square. It’s an old fashioned, rustic sort of design, and I thought it would fit the look of our house pretty well. Of course our bed is a king size because I’m married to Paul Bunyan’s larger and less mature brother. And of course I thought it should cover the pillows and go almost to the floor because why not? How hard could it be? Let’s talk about how stupid this was…For my first quilt I chose a relatively uncomplicated but still time consuming design in an unmanageably huge size. Each square required sixteen 1 ½” strips, and a center square, and I needed 121 of them to cover the whole bed. That’s 2,057 strips of fabric! No problem. Start with a smaller project you say? That’s fear talking! I’ve never been much for practicing anything. It seems like a waste of time. I prefer to jump right into something and then beat myself up for sucking at it the first few times.
I did invest in one of those rotary cutting sets that comes with a special ruler, cutting mat, and a cutting wheel that looks like a pizza cutter but is shockingly and terrifyingly sharp. This helps you quickly and easily measure and cut pieces that are nice and straight and uniform. This was a fantastic investment, and it really improved my quilting game.

This picture is boring but necessary.
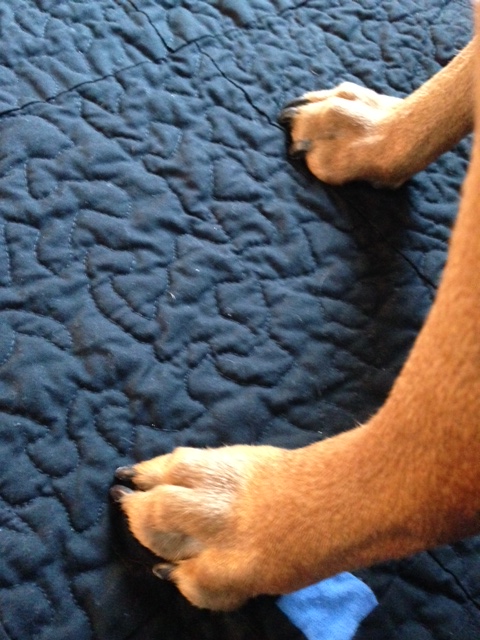
The most difficult part of making this first quilt was putting the backing on. At that point the whole front is together, so you’re working with a gigantic piece of fabric. It’s heavy and it wants to escape. And your dog wants to lay on the part that’s hanging off onto the floor.

I must lay on all of the blankets at once!
And your cat wants to attack the part that’s moving.

I will destroy you
And you keep spilling your beer because you didn’t move everything out of the way of the mammoth piece of fabric before you started. Sad trumpet noise.
It took me a while, but I got it all done and put together and it actually turned out pretty nice. For the first half of the process, it seemed like such a huge, time consuming project that I stalled out a couple times and let it sit for months. Once the end was finally in sight I got a little more motivated, and started to have fun with it.

Hello. I am a very large quilt.
So what did I learn? Big quilts are hard to maneuver. If you’re making a big quilt, get ready to muscle through it. Making a smaller quilt then planning on adding a border to increase the size after it was all together may have made it a little easier, but not by much. It was still just a big ass quilt.
Now for some useful advice- seam allowance! I was way too worried about conserving fabric, and ended up putting most of my seams too close to the edges of each piece. Since this quilt was so heavy, many of the seams tore after it was all put together, especially when I washed it that first time. Plan for at least ¼” seams, ½” if the fabric is delicate or a looser weave.

I had a lot of repairs to make after washing this quilt, but you know, live and learn.
After finishing this one, I wanted to try some smaller quilts that I could finish within a couple weeks. These next quilts were either copied from pictures I have seen or in one case, from a memory of a blanket I used to have as a kid. You can buy patterns that tell you exactly what size your pieces should be, including seam allowance, how much fabric you’ll need, etc, but I haven’t used a pattern yet. I use graph paper to draw out the squares and figure out sizes. After I do this, I can calculate how many squares I need to get the size I want, and how much fabric I’ll need to get it all done.

This is what math looks like when a forester does it.
I made these first three quilts on a Brother machine that I purchased after witnessing the ease with which my friend carted her’s around. When I saw Beth lift her new model Brother sewing machine with one hand, I was flabbergasted. “Lift with your legs!” I screeched with concern. Then “Wait, so your machine doesn’t weigh 80 pounds?” Apparently sewing machine technology had advanced somewhat since the 1960s. Brothers are inexpensive, basic but decent machines, and the one I bought did everything my old Penncrest could do but was much more convenient to move around. I don’t have one sewing area, I like to be able to work at a smaller table near the fireplace, or move to the big dining table if I need more space, or put everything away if I’m pretending to have a clean house.

Hello. I am a reasonably sized quilt.

Hello. It’s difficult to tell from these pictures but I am also a reasonably sized quilt.
Up until the most recent quilt, I’ve been finishing them using my great-grandma’s method of making little knots out of yarn throughout the quilt.

I’m sure this method originated with my great grandma. Shut up!
Most quilts these days have an over-stitching pattern that is usually referred to as free-motion quilting, or in some circles, just quilting. I don’t care for the term “quilting” being used this way because it makes it sound like it’s not a quilt unless it’s been “quilted.” By this logic neither I, nor my great grandma, has ever actually made a quilt. Go ahead, say that to my face. See what happens. The definition of a quilt is a joining of at least two fabric layers by stitches or ties. I looked it up. So there.
To do the free-motion quilting on a machine, you need a special foot. That’s the little stampy part that holds the fabric down as you sew. The special foot only holds the fabric down when the needle is actually going in, to allow you to move the fabric around at will.

It has a spring! (they don’t all have springs though).
I’m pretty sure that most machines can do free-motion quilting, provided you have two things. The special foot, usually called a quilting or a darning foot, and feed dogs that you can retract into the machine. The feed dogs are the little chompy treads that move the fabric forward. When doing this you want to move the fabric yourself, so the feed dogs need to go away.
Basically you’re just making random swirling stitches over the whole quilt after you’ve put the front, back, and innards together. Imagine writing or drawing by moving the paper instead of the pencil. And the paper is like, really big and stuff. It takes some practice, and this is one of the few times in my life that I’ve decided I might as well practice a bit before jumping right in. Here’s my practice.

I decided this was plenty of practice.
I can definitely tell that this is something that gets easier the more you do it, so I’m excited to keep going with it. The Galaga quilt is the first one I tried this with.
My first attempt at free motion quilting.
Bender is helping.
I want to state for the record that I copied this design from a picture that Travis found on the internet, I didn’t come up with this myself. I did this one the same way I did all the others. I broke it down into its individual squares, and then drew them out on graph paper. If you look closely at the quilting stitches, you can see my many, many, MANY mistakes. But overall it actually looks alright!
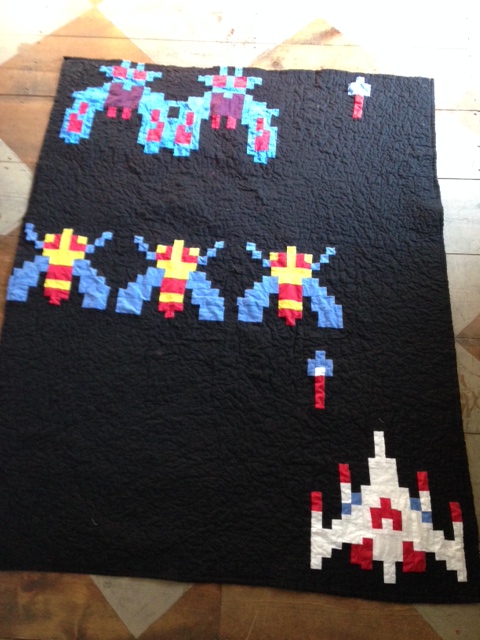
Galaga Quilt!!! *Pew pew pew*
I think the main take away from all this is that you can make hella mistakes, and it really won’t matter in the end. There’s a lot going on in a quilt, and no one is going to notice a few poorly aligned seams or some wobbly free-motion action. Before I finished the Galaga quilt, I decided I was into quilting enough to invest in a nicer machine specifically made for it.

Doesn’t this Singer look like a boss next to the old one?
This one came with a nifty extension table, the quilting foot, a whole host of other feet that probably have a function of some sort I guess (I’m not much for reading manuals, either), and a bunch of fancy stitching options that will allow me to jump punch quilting in its face. Sorry, I hang out with Travis too much. But the fancy machine is really not necessary. A basic machine, some fabric scraps, and the rotary cutting set are the only things you need for pretty great results.


Hey that was a cool article. Doubt I’ll be doing any quilting soon but you never know. Linda has a fairly nice sears sewing machine. I bought it for her right after I bought her a new Remington 742 in 30.06 caliber. She said she had no use for it so I said I would use it. That’s how I got over to the Sears store. Funny how things like that happen. Happy New Year to you and Paul Bunyon’s younger brother.
Tom Nagle
Quilts are the best, and that was a good post. The caption on the cat photo made me laugh out loud (seriously) because my wife has said those same words a thousand times on behalf of our cats.
You are awesome, Mindy!!!!!