
One of our many hobbies is to cure meat. Just seems like a good skill to have. Dry cured sausage is shelf stable, needing no refrigeration and it’s just damn tasty.
We talked about doing this for years until we finally just jumped in and gave it a rip. I am going to outline a few methods, but I will leave it to you to come up with your own recipes. I highly recommend Michael Ruhlman’s book Charcuteri for further information and inspiration.
First, you will need meat. In the pic below we have 50% deer I killed, and 50% happy pig raised by a friend of mine on pasture. We butcher and grind all our own meat, but it’s not a necessity for this operation, so I will skip that step.
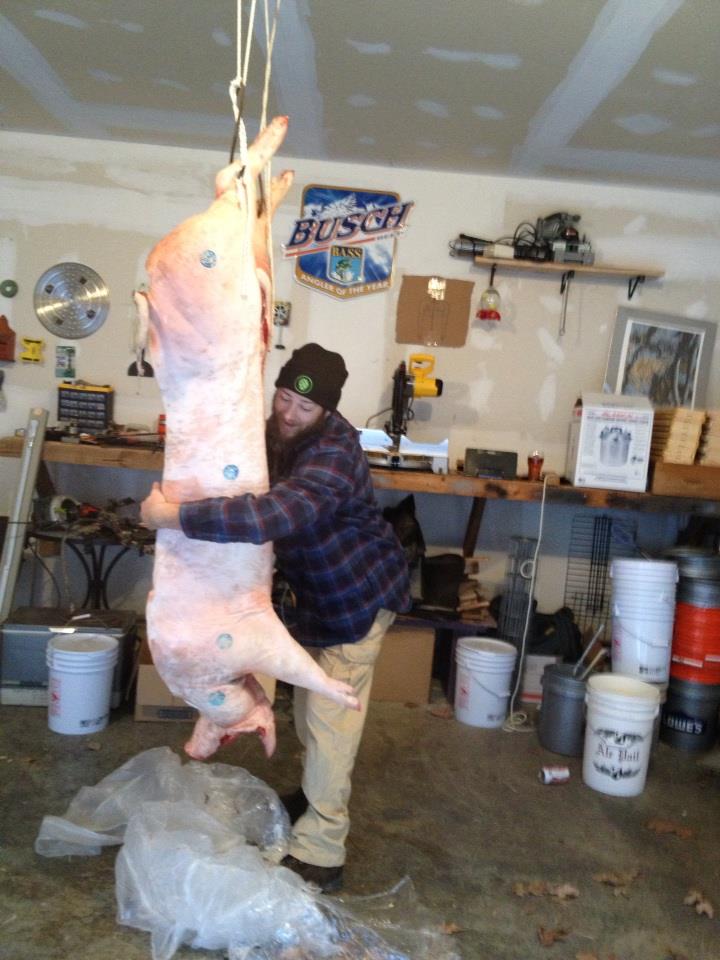
This pig was treated very well in life and gets a hug from me in death.
This picture shows a 50 pound bowl o’ meat! The device on the right is a meat mixer. You can just use your hands though. Even better option is to use someone else’s hands because the meat needs to stay very cold (gets just a little painful) through the whole process to keep the fat from running.
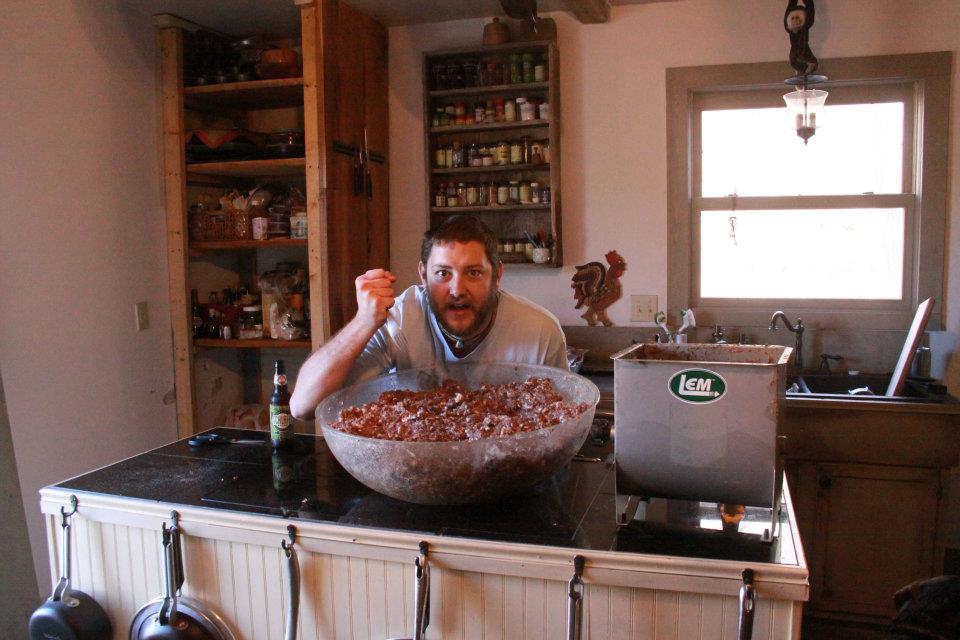
Stay Away!!
Then we build our spices. The very important aspect of your recipe is the amount of salt, cure, bactoferm, and sugar. Any other flavorings you can can adjust to your liking.
First, everyone knows what salt and sugar are, but the cure and bactoferm might be unknowns. Two main cures exist for us to play with (and they should never be played with!). Cure #1 (called insta cure 1, prague powder 1, DQ curing salt, etc..) is all salt and sodium nitrite. It is used for things that are not hung out to dry for very long. Things like bacon, braeseola, lomo, etc…basically, if it will be totally dry and ready to eat in a week or two, go with cure number 1. The other cure is cure #2 (called all the same things but with 2 instead of 1. shocker!) It is salt, sodium nitrite and sodium nitrate. The nitrate acts as a slow release mechanism, converting into nitrite as time goes on. This is used for things that need to hang to dry for more than 2 weeks. So, these salami get cure #2 in order to protect them from bacterial contamination.
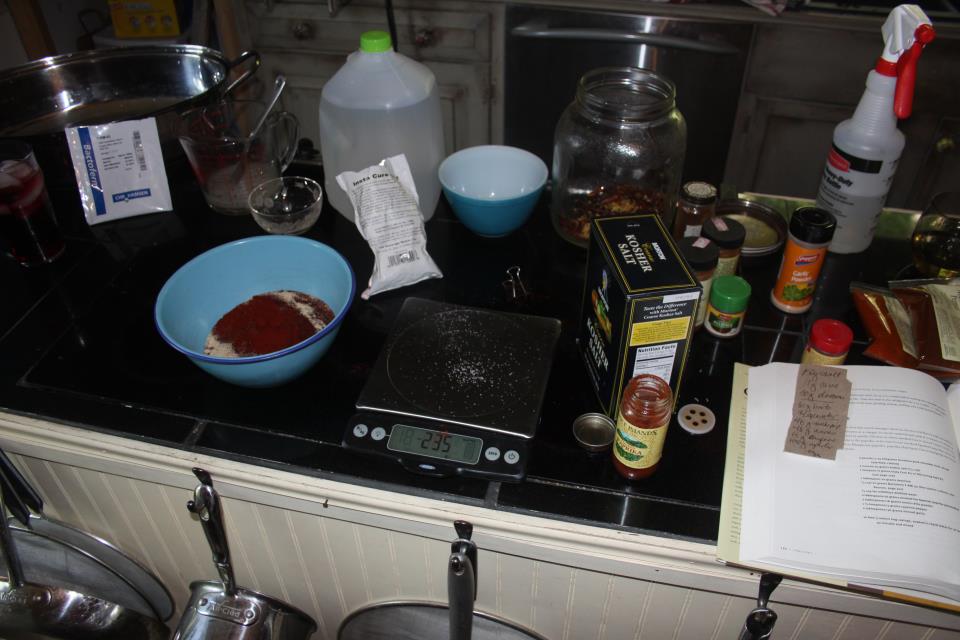
Scale! get one. They are cheap and needed for accurate measurements.
A quick word about nitrites. I don’t want to get too deep into this argument, but don’t believe all the hype. Look up what they are and where they naturally exist and make up your own mind.
The bactoferm is responsible for causing a bacterial fermentation, same basic thing as what makes sourdough, hot sauce, and kimchi delicious. The bactoferm drops the pH of the meat, making it inhospitable for bad bacteria and also creates a slight “twang” that is in all the best salami.
Both cures and bactoferm are available from online suppliers like Butcher & Packer or Sausagemaker.
Now, you have your seasoning all mixed into your meat and it looks and smells delicious. Don’t eat it yet!
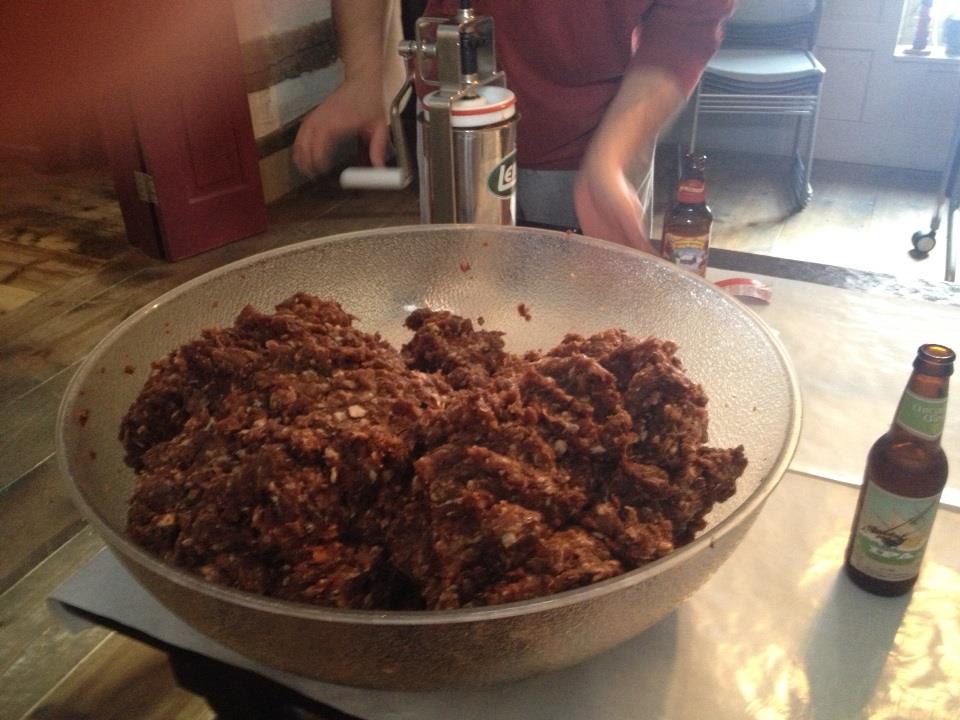
om nom nom nom
You need to put it into a stuffer. This is a tool that really is needed. don’t try and use a stuffing attachment on a grinder, the results aren’t good. For small batches, a large jerky gun will work, otherwise, buy a stuffer. If you are friendly with a butcher, they may stuff it into casing for you. Worth asking about anyway.
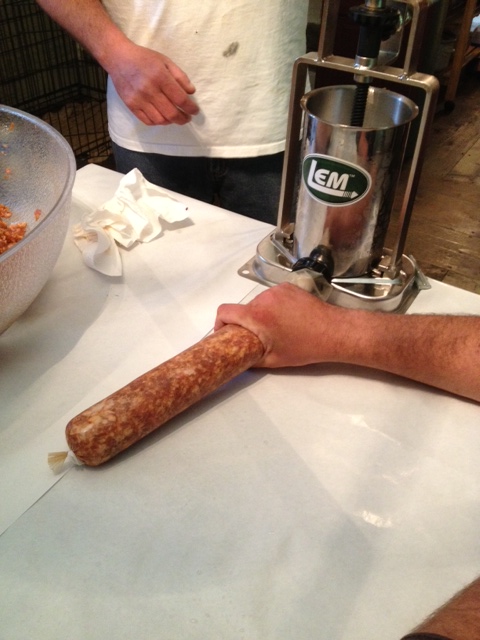
Can’t think of a caption that isn’t also a dirty joke.
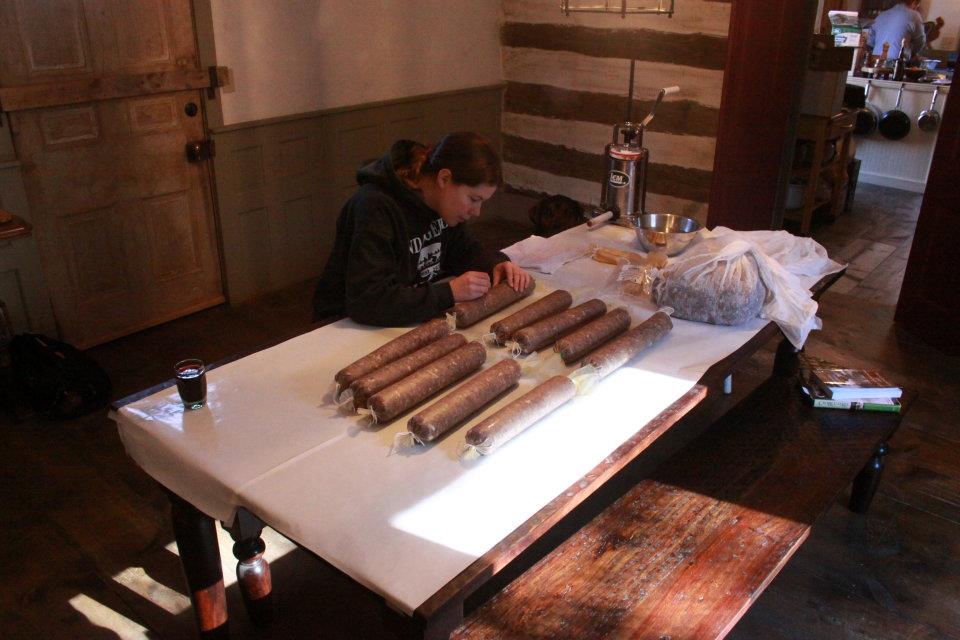
I like to stuff it into various sizes because that way you have some ready much earlier. The snack stick size is edible in only a week or so!

Table’s starting to fill up!
Ok, so maybe I like a whole bunch of snack sticks…

Mine!
Once everything is stuffed, find some sucker…I mean helper, to go through with a CLEAN pin (heat to sterilize) and poke any large air bubbles that are visible inside the casings. As you get better working with your stuffer you can minimize these, but expect them to exist as your are learning.
Mindy is poking air bubbles
Once that is all done, it is time to weigh them. Just take a weight on the digital kitchen scale you bought in order to be sure of your ingredient amounts. We write the weight on a little paper tag and tie it on with the string that is attached to the tag. You’ll understand why later.
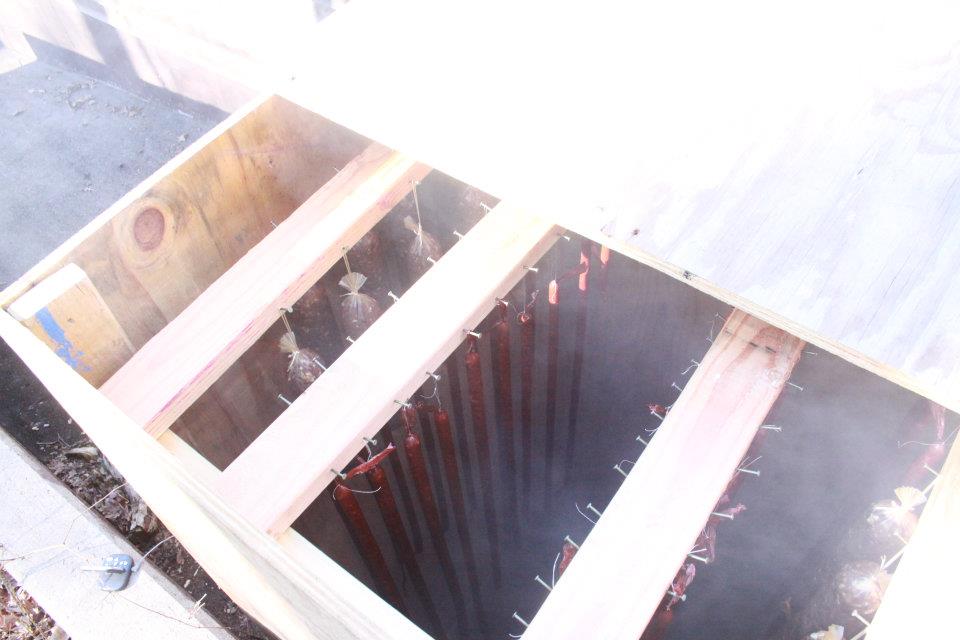
Then it is time to cold smoke it!!! (assuming you are making a smoked style salami) We just build a box out of plywood and attach 2×4’s to the top to rest the other wood that the meat hangs from. Then, we put another piece of plywood on the top. It sounds like a great deal of work, but it’s not at all. Take you 15 minutes.
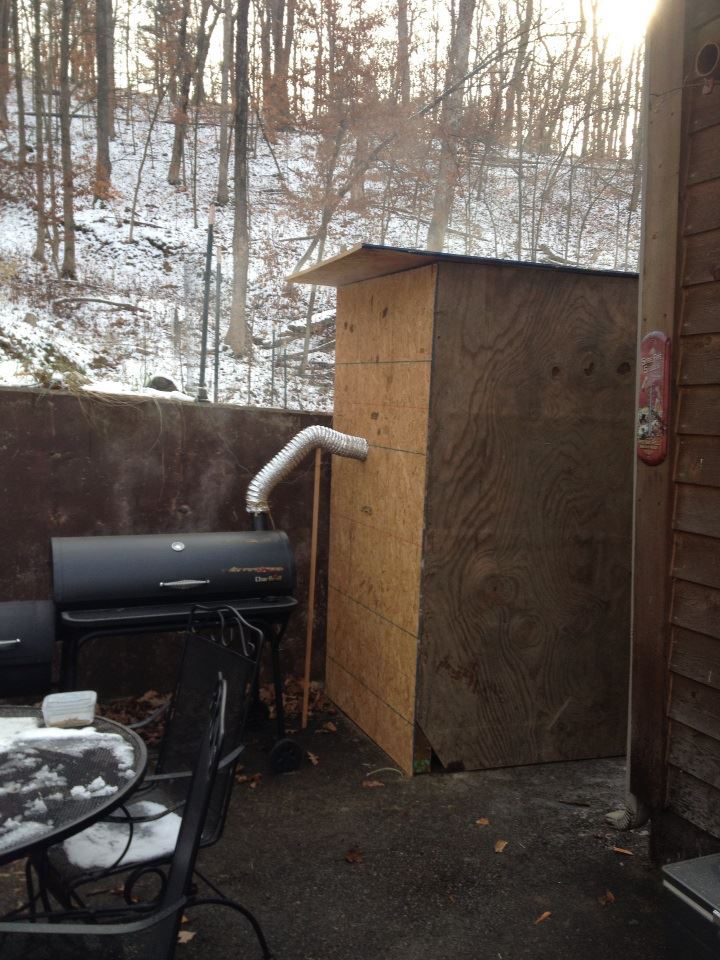
The metal dryer vent forces the smoke into the box
The above picture shows our “rig”. The fire is in the smallest metal box on the far left of the black smoker, the one that is slightly lower. This fire is contained and safe to leave alone. We smoke our salami for anywhere from one day to three days depending on how windy it is (the wind draws the smoke out of the box faster and equals longer smoking time.
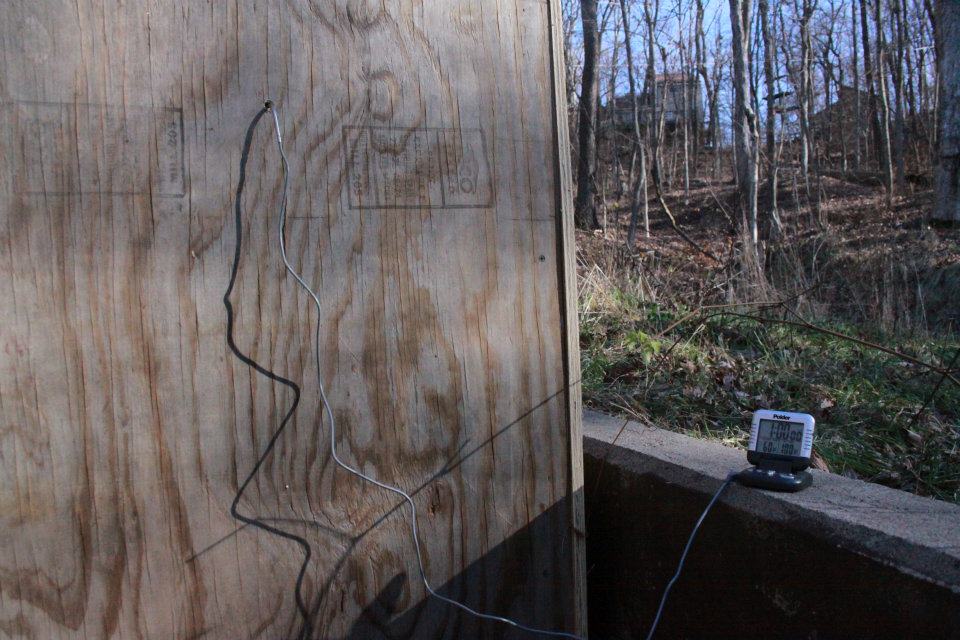
thermometer hole
It is important when cold smoking to not let the heat inside the box get above 80 degrees or so. With a system like ours, that’s pretty much impossible.
*cough* lookin’ good! *cough*
After they have smoked, take them out. Notice the color has changed drastically.

Yowza!
Now they are ready to hang! Find a nice place that is dark, has a temp between 45-65 and a humidity range of 45-65%. Now….where could anyone find something like that….hmmm….while you are thinking, just set something up in your basement. The darkness is very important. Fat hates light, just remember that. A light bulb turned on every now and then is not a big deal, but sunlight is a very big problem.
When you hang them, just use the same sticks or boards they were hanging on in the smoker. If you are using a hygrometer to watch the humidity of your hanging area (not necessary) you will notice it will spike up to 85% or higher when you first put the sausages there. This is because they are wet and venting into the air. This is a good thing though, don’t worry about it.
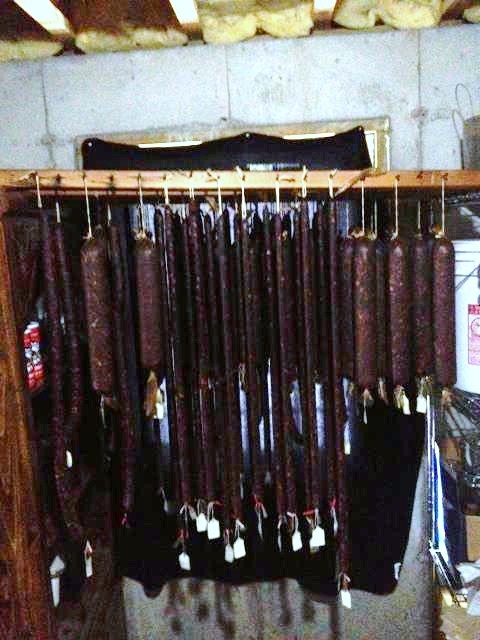
Happy sausages!
After a week, you may want to flip over the larger salami’s because they might start settling to the low side. This should only be necessary once.
For me, this is the hardest part. Be patient. That weight you wrote down earlier, it is not finished until it has lost 30% of that weight. Beyond that, it’s all personal preference. I prefer a drier salami, which means mine dry to 40% usually.
As far as time tables go, this is roughly 1.5 weeks for snack stick size and 5 weeks for large salami size, depending on the case sizes you choose.
Once it has hit 30% weight loss, it’s safe to eat. It can be very fun to compare the flavor difference between the small size and the large, a few extra weeks hanging really changes the flavors dramatically.
Enjoy!!

I just made some venison summer sausage and due to my first attempt I forgot to puncture those air bubbles. Now as I am drying these delictables the air bubbles are quite defined. Question? What can I expect from this forgotten step regarding meat texture, flavor, etc?
You puncture the air bubbles because that’s where the devil lives! no, but seriously, some funky stuff can grow in there. Can you pop them now? Just sanitize a small pin with a flame and go pop them. It won’t change the texture, but it’s a safety thing. One factor in this is what kind of casing you used, but if the bubble is filled with gas now, that means the gas is not escaping as it should.
Thanks for response. I used collagen casings. I am hoping things will work out. The casings are dry now so I sprayed a mist of water on them and punctured the dry bubbles. Hopefully the casings will shirk and adhere to the meat. I.e. Monday I stuffed casings, then fermented for 24 hours @ 80-90% humidity and 85 F, Tuesday smoked sausages for 6 hours until internal temp reached 140 degrees, then put in drying area maintaining 65-75% humidity, and 60-70 F. I used cure #1 and starter culture bactoferm F-LC in porportions of recipe. I am hoping to dry sausage until approximately 30% of moisture is evaporated. Again thanks!